

How To Check Metering Film Camera
How To Use Your Camera'due south Internal Light Meter
Your photographic camera's internal light meter is one of the nearly important tools yous take every bit a lensman. This handy tool helps you to see exactly how brilliant your photo volition look earlier you always accept a picture. There'south a lot more than meets the eye with this feature, which is why it's so important to sympathise your cameras internal light meter and how to apply it effectively.
In this commodity, you'll learn how to utilise your camera's internal light meter and why information technology's essential for your photography. Once y'all acquire how to use this tool properly, you'll be nailing the perfect exposure, without whatever examination shots! Let'due south jump in.
What Is A Light Meter?
The light meter is a handy lilliputian tool that tells you how bright your photo volition wait before you lot take even information technology. It works past measuring the light in the scene, then tells you how brilliant your moving-picture show will look based on your electric current settings. This is an essential function of transmission mode.
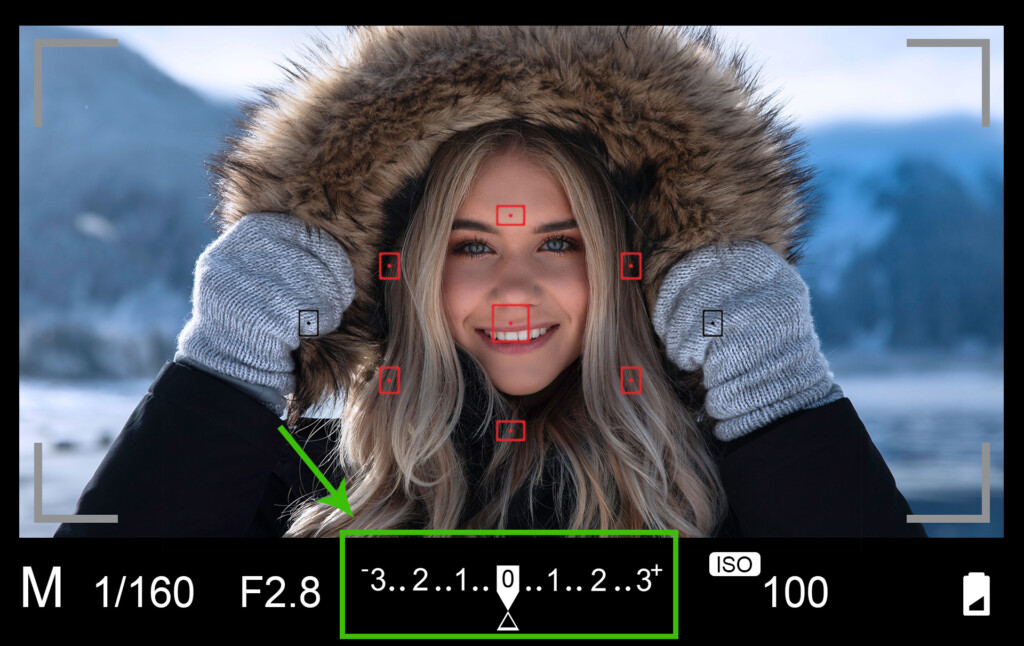
The light meter is institute in two places. The outset place is through your camera'due south viewfinder. When you look through the viewfinder, y'all'll encounter a readout of all your current camera settings. In the middle of these settings is a line with numbers ranging from 0 to iii. This is the photographic camera'southward internal light meter!
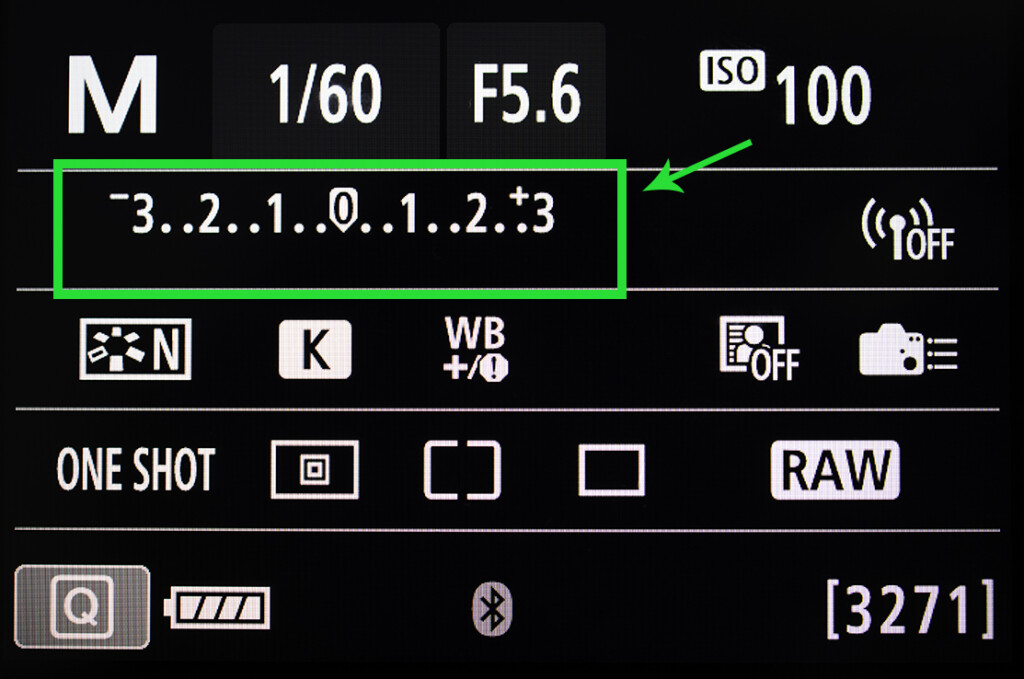
The 2d identify yous will observe it is in your cameras settings display. It's notwithstanding displayed the aforementioned way, just in a different position. Information technology all operates the aforementioned regardless of which identify you cull to await at information technology.
To see your camera's internal light meter in action, switch your cameras mode dial to M for manual manner. With a half-press of your shutter push, a small indicator volition appear below your light meter. This indicator tells you how vivid your exposure will be for the photo you are nigh to have.
Once yous learn how to read exactly what this indicator is telling you, information technology becomes like shooting fish in a barrel to cull the correct settings! I'll get more into how to read your camera'south internal lite meter subsequently in the article.
Why Are Internal Calorie-free Meters Important?
Choosing the right exposure is absolutely crucial for every photo you have. By learning how to employ your photographic camera's internal calorie-free meter, you tin make this process easy. If your picture is besides bright or besides dark, you get something known as 'clipping'. Clipping is when there is no more detail left to display in a certain range of highlights or shadows. It'south primarily the result of using incorrect exposure settings. Clipping will create areas of your photo that are entirely blackness or completely white and cannot be recovered no matter how much mail-processing magic you try. Luckily, clipping can be hands avoided past using your camera'due south internal light meter.
The calorie-free meter helps you to choose the correct exposure based on the amount of light in your scene. The readout will continually change depending on what your camera is pointing at. Even if you lot are still using the aforementioned settings, the internal light meter volition read differently in unlike parts of the scene.
This is incredibly useful because it constantly updates and offers you a amend idea of whether yous need to brighten or darken your exposure. As the light changes, so does your light meter. This gives you an accurate and efficient mode of picking the right exposure settings, no matter what.
How To Read Your Photographic camera's Lite Meter
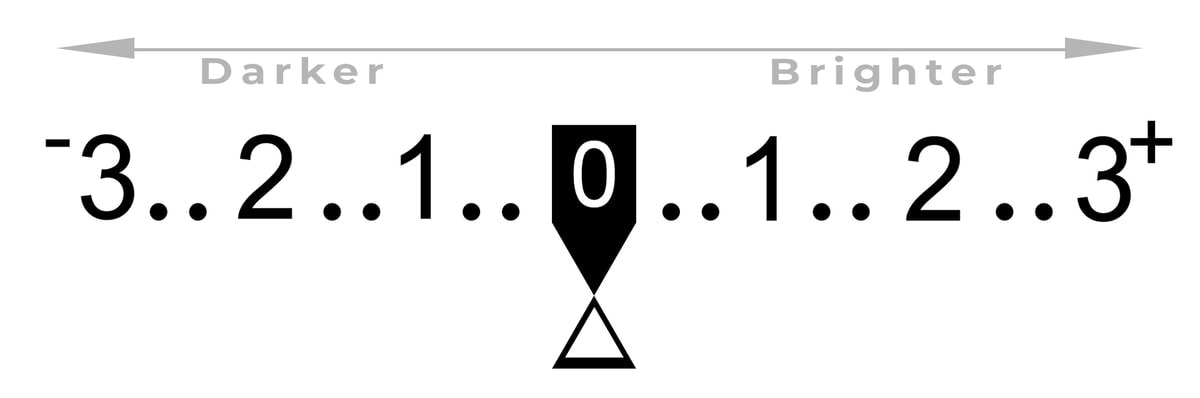
Information technology'southward pretty difficult to larn how to use your cameras internal light meter if you don't know how to read one. A lite meter is a line with a 0 in the middle, with the numbers 1, 2, and 3 going out in either direction from the center. The showtime of import thing to know is that each of these numbers indicates a full finish. The college the number, the further away you are from an fifty-fifty exposure.
The numbers on the right side of the center indicate brightness. This is actually easy to call back but by looking at the picayune + icon on the right side of the light meter. Equally the numbers increase, and so does the brightness of your photo.
On the contrary end, the numbers on the left side of the eye indicate darkness.As the numbers increase to the left, so does the darkness of your photo. Once again, this is piece of cake to recall by looking at the – icon on the left side of the light meter.
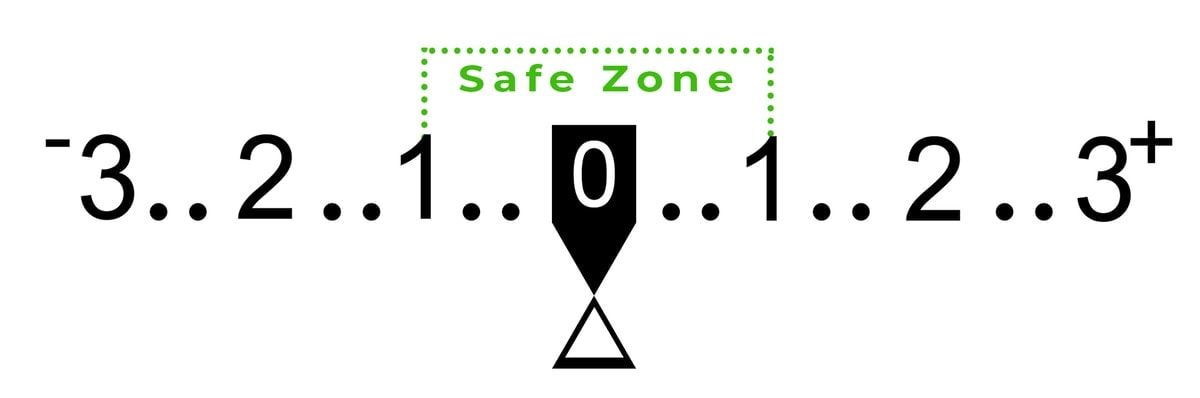
When you first look at the lite meter, there is no indicator displayed. An indicator volition but appear one time you lot one-half-press the shutter button. Based on your electric current settings, it will sit somewhere forth your light meter. The goal is the have your indicator sit as close to the center of your light meter as possible. This fashion, you'll exist certain to have the most balanced exposure.
As a general rule of thumb for beginners, don't let your exposure be above i stop in either direction on your light meter. If you lot want to go the best quality image with the most detail in the highlights and shadows, sticking under 1 cease on either side of your calorie-free meter is the safest bet. You lot'll be almost guaranteed to entirely reduce your chances of clipping while staying in this exposure range
Metering Modes
The internal low-cal meter volition offer different readouts depending on your metering mode. Permit's intermission down the different types of metering modes and how they meter lite differently.
– Evaluative Metering

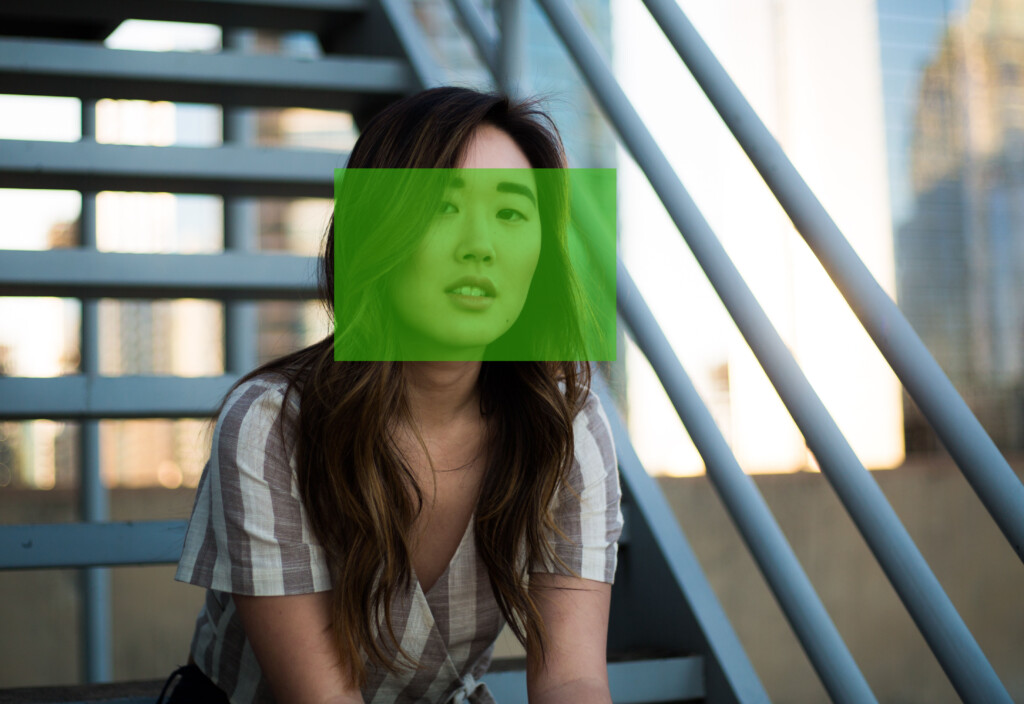
Evaluative metering takes an overall approximation of all the light in your scene. It takes into account the highlights, shadows, and mid-tones and offers an approximately balanced exposure for all of these areas. This is the default metering manner on most cameras and can work exceptionally well. However, the places this fashion will struggle in is when your subject is backlit. Since there's usually such a massive difference in exposure betwixt the groundwork and the subject, it will recommend using an exposure that notwithstanding leaves your subject area adumbral. This is important to be enlightened of if you notice yourself in backlit situations!
– Spot Metering
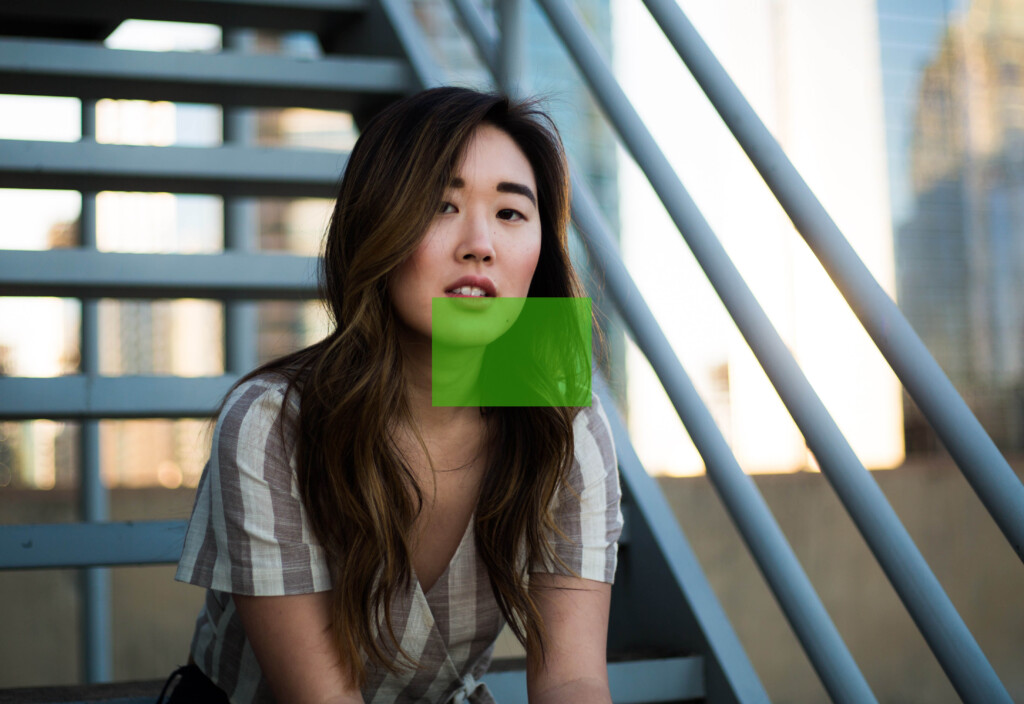
Spot metering but meters the area around your main AF betoken. It doesn't accept into consideration anything exterior of this point, merely it volition offer a perfect exposure for that i expanse. This is most useful when shooting portraits when you want your subject's skin or clothing to expect nicely exposed. By adjusting your AF indicate, you lot can meter any brighter areas on your subject to help you become a better idea of what exposure is best suited.
– Partial Metering
Partial metering will but meter a modest portion of light within the center of your frame. It doesn't take into business relationship everything beyond the centre of your photograph, and then information technology will only give you a readout of whatsoever'south sitting center punched in the frame. This metering mode is useful when your subject is in the centre of your photo. It's non fantastic for general purposes, simply it can work well when the situation caters towards its uses!
– Weighted Boilerplate Metering

Weighted average metering takes into consideration everything in your frame, but favors the centre of the image. That means that it'due south going to adopt to accurately expose the middle of your image more everything else. With that said, it does even so accept into consideration everything in your photo, unlike some other metering modes. This metering style offers another worthy option for general employ if y'all like to center dial your subjects.
Now in that location isn't any 'best' metering mode. Each metering mode has its own uses and thrives in some situations more than others. You lot don't take to get too defenseless up in choosing the right metering way. If you are unsure, I'd recommend leaving your metering manner set to 'Evaluative Metering' for general use!
The Downside Of Internal Low-cal Meters
Although internal light meters can and will give y'all a reading for your exposure, information technology doesn't e'er provide the best suggestions. When there is a huge deviation in exposure (such as a sunny sky versus a shaded foreground), the calorie-free meter will struggle to requite an accurate reading. When at that place is a meaning difference in exposure in your photo, the suggested reading doesn't always work flawlessly.

In situations like this, effort to discover an exposure value between the darkest and lightest parts of your photograph. If you tin properly expose for the 'in-between', you'll be able to balance out the highlights and shadows plenty to recover in post.
Regardless of what your light meter says, make sure to look at the highlights and shadows to identify any problem areas in your exposure. A lot can be recovered in mail, but not if some exposures are clipped. Another valuable tool you can utilize to double-check your calorie-free meter is the histogram.
How To Use An Internal Light Meter
Information technology's swell to understand how an internal low-cal meter works, simply how are you supposed to use i? Permit'due south dive into the process of using your camera'due south internal light meter to nail your exposure settings.
Pace 1: Set Your Base Exposure
In the get-go step, you need to pick your camera settings. When using manual style, I e'er advise picking one setting y'all can't exercise without and work the others around that i. These settings being the three pillars of exposure, aka shutter speed, aperture, or ISO. If you're new to these settings, make certain to download my costless Photography Essentials ebook to learn the verbal procedure behind choosing your camera settings!
After you have a rough guess of your camera settings, half-press the shutter button and see what the light meter reads at.
Step 2: Make Necessary Adjustments After Offset Reading
The indicator will tell you lot exactly how many stops you are away from a good exposure. For case, let'due south say the low-cal meter reads at +3, meaning yous have to darken your photo by 3 stops. You could do this in a variety of ways, whether it exist speeding upwardly your shutter speed, endmost down your aperture, or lowering your ISO setting.
Step iii: Have Another Reading
Once yous've adapted your settings, recheck your light meter, and come across where the indicator is sitting at now. If information technology's sitting close to 0, yous're in the perfect zone to capture your photo. If you're withal off, repeat steps 2 and 3 until you lot have a balanced exposure reading between -ane and +1.
Footstep 4: Take Your Photo
Now information technology'southward fourth dimension to accept your photograph. Hit the shutter push button and check the event! Review the prototype to see if there are any problem areas that may be completely black or white. You may need to play around with your settings farther according to this effect.
How Much You Tin can Push Your Exposure
Not every photo you accept is going to have a perfect exposure that meters at 0. In fact,most probably won't. There's goose egg wrong with an exposure that'south a piddling scrap 'off', and it all depends on the scene you're shooting. The acceptable exposure range for your photo will all depend on whether you lot're shooting in RAW or JPEG.
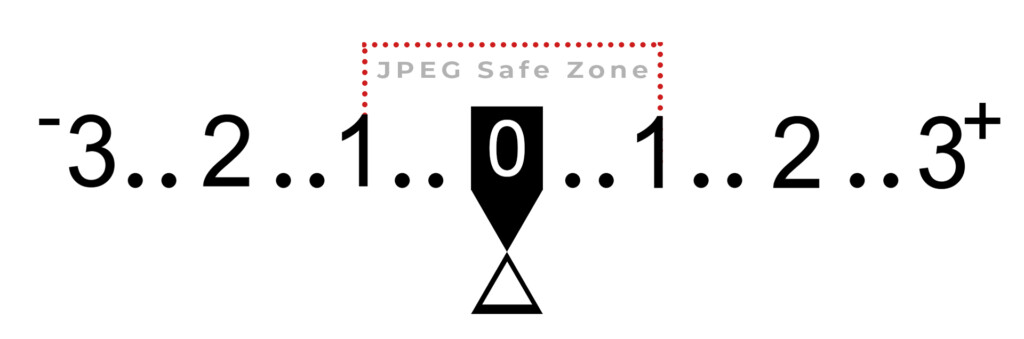
If you're shooting in JPEG, your photograph volition exist more compressed and harder to edit in postal service. In this case, it's best to go along your light meter reading betwixt -ane and +1. This is a safe range that will make certain no parts of your photo are too vivid or too dark. Everything will be reasonably exposed with no demand to lighten in mail.
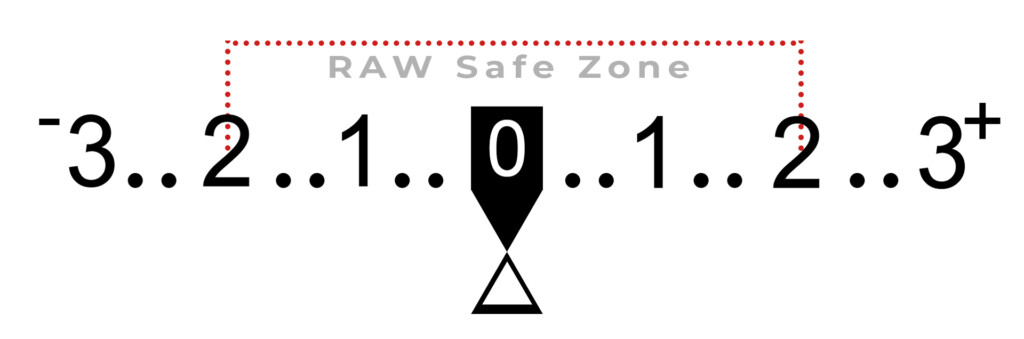
If you lot are shooting in RAW, so you lot tin can go away with a little more. RAW files are uncompressed and accept more information to them. This ways you lot can get abroad with a light meter reading of -2 to +two. You'll more than than probable be able to recover any information in this range with a bit of post-processing exposure adjustments! Any more than this, and you brainstorm to risk clipping parts of your paradigm.
Now I bet in that location was a lot more than that goes into using your cameras internal light meter than you lot expected! This little tool has a lot of capabilities and useful tricks to help you smash down the best exposure for your scene. By implementing the tips in this article, y'all'll start to understand how to utilize your photographic camera'due south internal lite meter in no fourth dimension!
If you enjoyed this commodity and know someone who should learn more well-nigh using their internal light meter, brand sure to share this post with them!
Also, if you're new to manual mode and working with your exposure settings, be sure to download my Photography Essentials ebook for free below!
Source: https://www.bwillcreative.com/how-to-understand-your-cameras-internal-light-meter/
Posted by: poorewiced2001.blogspot.com
0 Response to "How To Check Metering Film Camera"
Post a Comment